私はDependencyInjectorの作成者です。これは、Pythonの依存関係インジェクションフレームワークです。
このチュートリアルでは、DependencyInjectorを使用してFlaskアプリケーションを開発する方法を示したいと思います。
マニュアルは次の部分で構成されています。
完成したプロジェクトはGithubにあります。
開始するには、次のものが必要です。
- Python 3.5+
- 仮想環境
そして、次のことが望ましい。
- フラスコでの初期開発スキル
- 依存関係の注入の原理を理解する
何を構築しますか?
Githubでリポジトリを検索するのに役立つアプリケーションを構築します。それをGithubNavigatorと呼びましょう。
Github Navigatorはどのように機能しますか?
- ユーザーはWebページを開き、検索クエリの入力を求められます。
- ユーザーがクエリを入力し、Enterキーを押します。
- Github Navigatorは、Githubで一致するリポジトリを探します。
- 検索が終了すると、GithubNavigatorはユーザーに結果を含むWebページを表示します。
- 結果ページには、見つかったすべてのリポジトリと検索クエリが表示されます。
- リポジトリごとに、ユーザーには次の情報が表示されます。
- リポジトリ名
- リポジトリの所有者
- リポジトリへの最後のコミット
- ユーザーは任意の要素をクリックして、Githubで自分のページを開くことができます。

環境を整える
まず、プロジェクトフォルダと仮想環境を作成する必要があります。
mkdir ghnav-flask-tutorial
cd ghnav-flask-tutorial
python3 -m venv venv
次に、仮想環境をアクティブ化します。
. venv/bin/activate
環境の準備ができたので、プロジェクト構造から始めましょう。
プロジェクト構造
現在のフォルダに次の構造を作成しましょう。今のところ、すべてのファイルを空のままにします。これはまだ重要ではありません。
初期構造:
./
├── githubnavigator/
│   ├── __init__.py
│   ├── application.py
│   ├── containers.py
│   └── views.py
├── venv/
└── requirements.txt
FlaskとDependencyInjectorをインストールする時が来ました。
次の行をファイルに追加しましょう
requirements.txt:
dependency-injector
flask
それでは、それらをインストールしましょう。
pip install -r requirements.txt
そして、インストールが成功したことを確認します。
python -c "import dependency_injector; print(dependency_injector.__version__)"
python -c "import flask; print(flask.__version__)"
次のようなものが表示されます。
(venv) $ python -c "import dependency_injector; print(dependency_injector.__version__)"
3.22.0
(venv) $ python -c "import flask; print(flask.__version__)"
1.1.2
こんにちは世界!
最小限のハローワールドアプリを作成しましょう。
次の行をファイルに追加しましょう
views.py:
"""Views module."""


def index():
    return 'Hello, World!'
次に、依存関係のコンテナ(以下、単にコンテナ)を追加しましょう。コンテナには、アプリケーションのすべてのコンポーネントが含まれます。最初の2つのコンポーネントを追加しましょう。これはFlaskアプリケーションおよびビュー
indexです。
以下をファイルに追加しましょう
containers.py:
"""Application containers module."""

from dependency_injector import containers
from dependency_injector.ext import flask
from flask import Flask

from . import views


class ApplicationContainer(containers.DeclarativeContainer):
    """Application container."""

    app = flask.Application(Flask, __name__)

    index_view = flask.View(views.index)
次に、Flaskアプリケーションファクトリを作成する必要があります。通常はと呼ばれ
create_app()ます。コンテナを作成します。コンテナは、Flaskアプリケーションの作成に使用されます。最後のステップは、ルーティングを設定することindex_viewです。リクエストを処理するために、コンテナからのビューをアプリケーションのルート「/」に割り当てます。
編集しましょう
application.py:
"""Application module."""

from .containers import ApplicationContainer


def create_app():
    """Create and return Flask application."""
    container = ApplicationContainer()

    app = container.app()
    app.container = container

    app.add_url_rule('/', view_func=container.index_view.as_view())

    return app
コンテナは、アプリケーションの最初のオブジェクトです。他のすべてのオブジェクトを取得するために使用されます。
これで、アプリケーションで「Hello、World!」と言う準備ができました。
ターミナルで実行:
export FLASK_APP=githubnavigator.application
export FLASK_ENV=development
flask run
出力は次のようになります。
* Serving Flask app "githubnavigator.application" (lazy loading)
* Environment: development
* Debug mode: on
* Running on http://127.0.0.1:5000/ (Press CTRL+C to quit)
* Restarting with fsevents reloader
* Debugger is active!
* Debugger PIN: 473-587-859
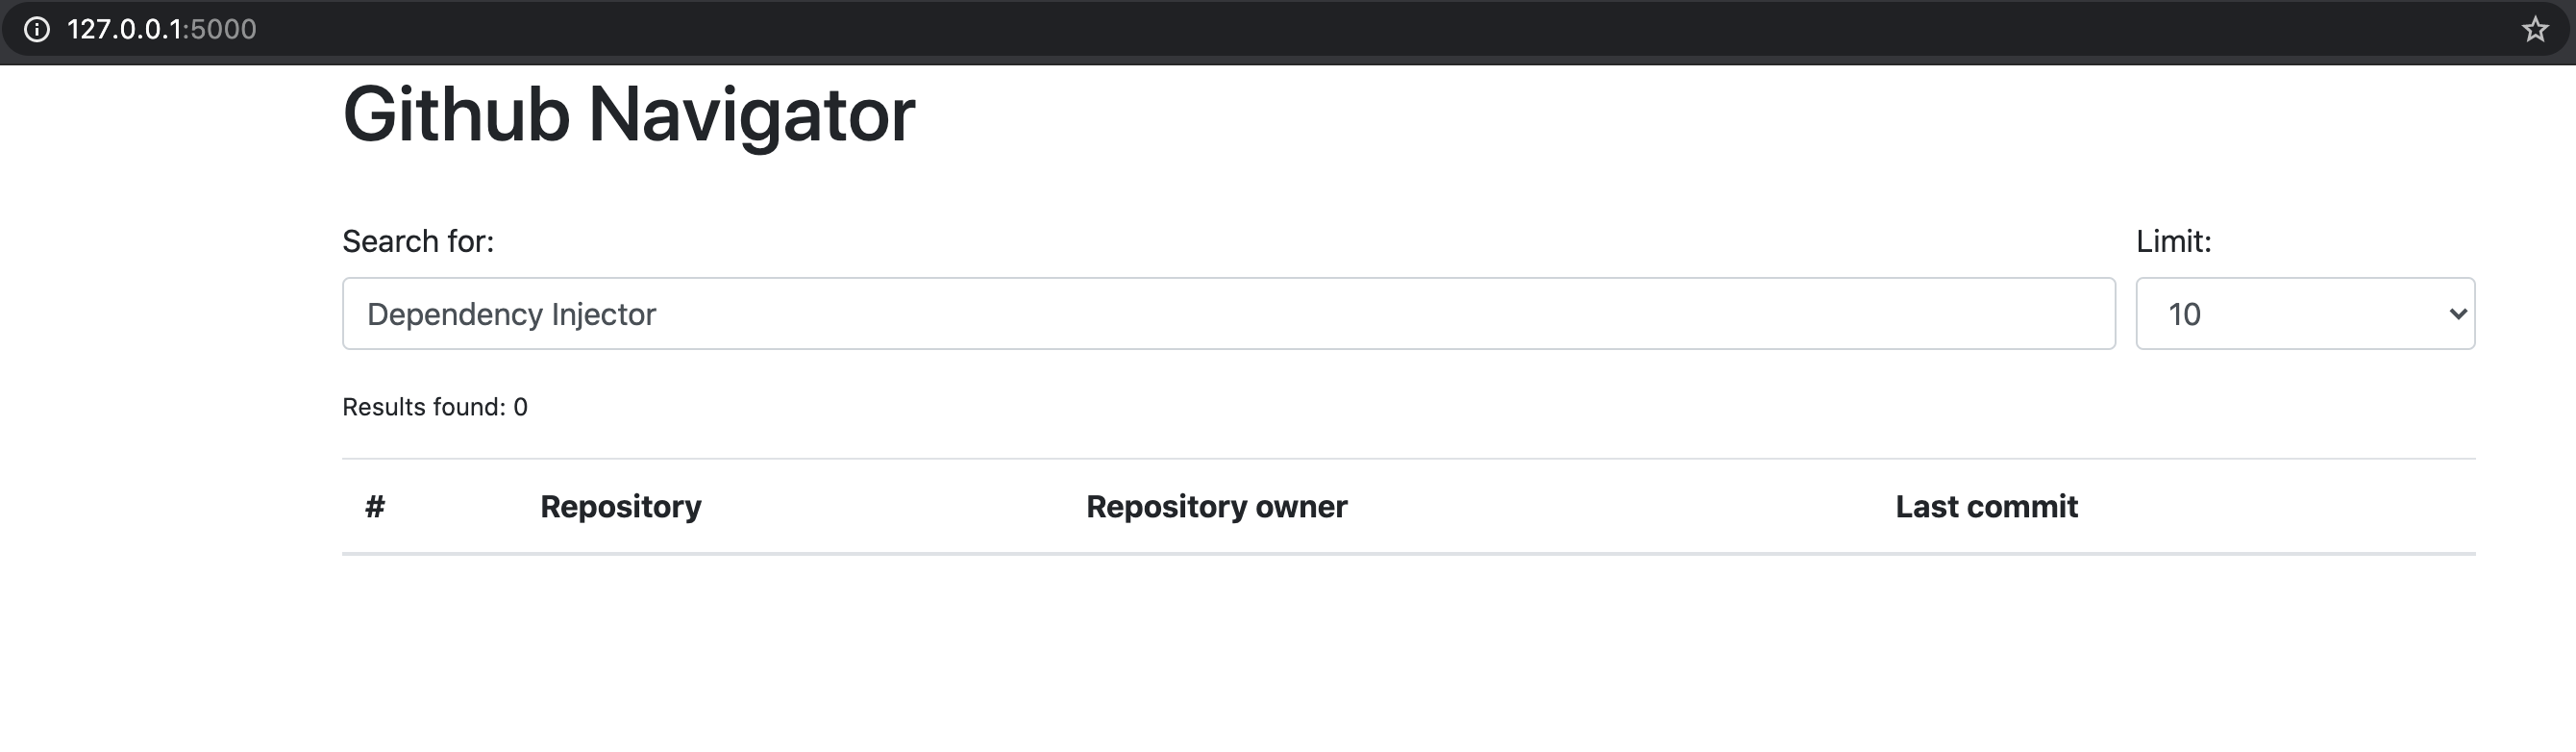
ブラウザを開き、http://127.0.0.1:5000 /にアクセスします。
「Hello、World!」が表示されます。
優れた。最小限のアプリケーションが起動し、正常に実行されます。
少しきれいにしましょう。
スタイルを含む
Bootstrap4 を使用します。これにはBootstrap-Flask拡張機能を使用しましょう。数回クリックするだけで、必要なすべてのファイルを追加できます。
追加
bootstrap-flaskするにはrequirements.txt:
dependency-injector
flask
bootstrap-flask
ターミナルで実行します。
pip install --upgrade -r requirements.txt
次に、拡張機能
bootstrap-flaskをコンテナに追加しましょう。
編集
containers.py:
"""Application containers module."""

from dependency_injector import containers
from dependency_injector.ext import flask
from flask import Flask
from flask_bootstrap import Bootstrap

from . import views


class ApplicationContainer(containers.DeclarativeContainer):
    """Application container."""

    app = flask.Application(Flask, __name__)

    bootstrap = flask.Extension(Bootstrap)

    index_view = flask.View(views.index)
拡張機能を初期化しましょう
bootstrap-flask。変更する必要がありますcreate_app()。
編集
application.py:
"""Application module."""

from .containers import ApplicationContainer


def create_app():
    """Create and return Flask application."""
    container = ApplicationContainer()

    app = container.app()
    app.container = container

    bootstrap = container.bootstrap()
    bootstrap.init_app(app)

    app.add_url_rule('/', view_func=container.index_view.as_view())

    return app
次に、テンプレートを追加する必要があります。これを行う
templates/には、パッケージにフォルダを追加する必要がありますgithubnavigator。テンプレートフォルダ内に2つのファイルを追加します。
base.html-基本的なテンプレートindex.html-メインページテンプレート
フォルダを作成
templatesし、2つの空のファイルの内側base.htmlとindex.html:
./
├── githubnavigator/
│   ├── templates/
│   │   ├── base.html
│   │   └── index.html
│   ├── __init__.py
│   ├── application.py
│   ├── containers.py
│   └── views.py
├── venv/
└── requirements.txt
それでは、基本的なテンプレートに記入しましょう。
次の行をファイルに追加しましょう
base.html:
<!doctype html>
<html lang="en">
    <head>
        {% block head %}
        <!-- Required meta tags -->
        <meta charset="utf-8">
        <meta name="viewport" content="width=device-width, initial-scale=1, shrink-to-fit=no">

        {% block styles %}
            <!-- Bootstrap CSS -->
            {{ bootstrap.load_css() }}
        {% endblock %}

        <title>{% block title %}{% endblock %}</title>
        {% endblock %}
    </head>
    <body>
        <!-- Your page content -->
        {% block content %}{% endblock %}

        {% block scripts %}
            <!-- Optional JavaScript -->
            {{ bootstrap.load_js() }}
        {% endblock %}
    </body>
</html>
それでは、マスターページテンプレートに入力してみましょう。
次の行をファイルに追加しましょう
index.html:
{% extends "base.html" %}

{% block title %}Github Navigator{% endblock %}

{% block content %}
<div class="container">
    <h1 class="mb-4">Github Navigator</h1>

    <form>
        <div class="form-group form-row">
            <div class="col-10">
                <label for="search_query" class="col-form-label">
                    Search for:
                </label>
                <input class="form-control" type="text" id="search_query"
                       placeholder="Type something to search on the GitHub"
                       name="query"
                       value="{{ query if query }}">
            </div>
            <div class="col">
                <label for="search_limit" class="col-form-label">
                    Limit:
                </label>
                <select class="form-control" id="search_limit" name="limit">
                    {% for value in [5, 10, 20] %}
                    <option {% if value == limit %}selected{% endif %}>
                        {{ value }}
                    </option>
                    {% endfor %}
                </select>
            </div>
        </div>
    </form>

    <p><small>Results found: {{ repositories|length }}</small></p>

    <table class="table table-striped">
        <thead>
            <tr>
                <th>#</th>
                <th>Repository</th>
                <th class="text-nowrap">Repository owner</th>
                <th class="text-nowrap">Last commit</th>
            </tr>
        </thead>
        <tbody>
        {% for repository in repositories %} {{n}}
            <tr>
              <th>{{ loop.index }}</th>
              <td><a href="{{ repository.url }}">
                  {{ repository.name }}</a>
              </td>
              <td><a href="{{ repository.owner.url }}">
                  <img src="{{ repository.owner.avatar_url }}"
                       alt="avatar" height="24" width="24"/></a>
                  <a href="{{ repository.owner.url }}">
                      {{ repository.owner.login }}</a>
              </td>
              <td><a href="{{ repository.latest_commit.url }}">
                  {{ repository.latest_commit.sha }}</a>
                  {{ repository.latest_commit.message }}
                  {{ repository.latest_commit.author_name }}
              </td>
            </tr>
        {% endfor %}
        </tbody>
    </table>
</div>

{% endblock %}
素晴らしい、ほぼ完了。最後のステップは
index、テンプレートを使用するようにビューを変更することindex.htmlです。
編集しましょう
views.py:
"""Views module."""

from flask import request, render_template


def index():
    query = request.args.get('query', 'Dependency Injector')
    limit = request.args.get('limit', 10, int)

    repositories = []

    return render_template(
        'index.html',
        query=query,
        limit=limit,
        repositories=repositories,
    )
完了。
アプリケーションが実行されていることを確認するか、http://127.0.0.1:5000 /を実行
flask runして開きます。
君は見るべきだ:
Githubを接続する
このセクションでは、アプリケーションをGithubAPIと統合します。PyGithub
ライブラリを使用します。 に追加しましょう:
requirements.txt
dependency-injector
flask
bootstrap-flask
pygithub
ターミナルで実行します。
pip install --upgrade -r requirements.txt
次に、GithubAPIクライアントをコンテナに追加する必要があります。これを行うには、モジュールから2つの新しいプロバイダーを使用する必要があります
dependency_injector.providers。
- プロバイダー
FactoryはGithubクライアントを作成します。 - プロバイダー
Configurationは、APIトークンとGithubタイムアウトをクライアントに渡します。
やってみましょう。
編集しましょう
containers.py:
"""Application containers module."""

from dependency_injector import containers, providers
from dependency_injector.ext import flask
from flask import Flask
from flask_bootstrap import Bootstrap
from github import Github

from . import views


class ApplicationContainer(containers.DeclarativeContainer):
    """Application container."""

    app = flask.Application(Flask, __name__)

    bootstrap = flask.Extension(Bootstrap)

    config = providers.Configuration()

    github_client = providers.Factory(
        Github,
        login_or_token=config.github.auth_token,
        timeout=config.github.request_timeout,
    )

    index_view = flask.View(views.index)
値を設定する前に、構成パラメーターを使用しました。これは、プロバイダーが機能する原則ですConfiguration。
最初にを使用し、次に値を設定します。
次に、構成ファイルを追加しましょう。
YAMLを使用します。プロジェクトのルートに
空のファイル
config.ymlを作成します。
./
├── githubnavigator/
│   ├── templates/
│   │   ├── base.html
│   │   └── index.html
│   ├── __init__.py
│   ├── application.py
│   ├── containers.py
│   └── views.py
├── venv/
├── config.yml
└── requirements.txt
そして、次の行を入力します。
github:
  request_timeout: 10
構成ファイルを操作するには、PyYAMLライブラリを使用します。依存関係のあるファイルに追加しましょう。
編集
requirements.txt:
dependency-injector
flask
bootstrap-flask
pygithub
pyyaml
依存関係をインストールします。
pip install --upgrade -r requirements.txt
環境変数を使用してAPIトークンを渡します
GITHUB_TOKEN。
次に
create_app()、アプリケーションの起動時に2つのアクションを実行するように編集する必要があります。
- から構成をロード
config.yml - 環境変数からAPIトークンをロードします
GITHUB_TOKEN
編集
application.py:
"""Application module."""

from .containers import ApplicationContainer


def create_app():
    """Create and return Flask application."""
    container = ApplicationContainer()
    container.config.from_yaml('config.yml')
    container.config.github.auth_token.from_env('GITHUB_TOKEN')

    app = container.app()
    app.container = container

    bootstrap = container.bootstrap()
    bootstrap.init_app(app)

    app.add_url_rule('/', view_func=container.index_view.as_view())

    return app
次に、APIトークンを作成する必要があります。
このために必要なもの:
このアイテムは一時的にスキップできます。
アプリはトークンなしで実行されますが、帯域幅は制限されます。認証されていないクライアントの制限:1時間あたり60リクエスト。この割り当てを1時間あたり5000に増やすには、トークンが必要です。
完了。
クライアントGithubAPIのインストールが完了しました。
検索サービス
検索サービスを追加する時が来ました
SearchService。彼は:
- Githubで検索
- コミットに関する追加データを取得する
- フォーマット結果の変換
SearchServiceGithubAPIクライアントを使用します。パッケージに
空のファイル
services.pyを作成しますgithubnavigator。
./
├── githubnavigator/
│   ├── templates/
│   │   ├── base.html
│   │   └── index.html
│   ├── __init__.py
│   ├── application.py
│   ├── containers.py
│   ├── services.py
│   └── views.py
├── venv/
├── config.yml
└── requirements.txt
それに次の行を追加します。
"""Services module."""

from github import Github
from github.Repository import Repository
from github.Commit import Commit


class SearchService:
    """Search service performs search on Github."""

    def __init__(self, github_client: Github):
        self._github_client = github_client

    def search_repositories(self, query, limit):
        """Search for repositories and return formatted data."""
        repositories = self._github_client.search_repositories(
            query=query,
            **{'in': 'name'},
        )
        return [
            self._format_repo(repository)
            for repository in repositories[:limit]
        ]

    def _format_repo(self, repository: Repository):
        commits = repository.get_commits()
        return {
            'url': repository.html_url,
            'name': repository.name,
            'owner': {
                'login': repository.owner.login,
                'url': repository.owner.html_url,
                'avatar_url': repository.owner.avatar_url,
            },
            'latest_commit': self._format_commit(commits[0]) if commits else {},
        }

    def _format_commit(self, commit: Commit):
        return {
            'sha': commit.sha,
            'url': commit.html_url,
            'message': commit.commit.message,
            'author_name': commit.commit.author.name,
        }
それでは
SearchService、コンテナに追加しましょう。
編集
containers.py:
"""Application containers module."""

from dependency_injector import containers, providers
from dependency_injector.ext import flask
from flask import Flask
from flask_bootstrap import Bootstrap
from github import Github

from . import services, views


class ApplicationContainer(containers.DeclarativeContainer):
    """Application container."""

    app = flask.Application(Flask, __name__)

    bootstrap = flask.Extension(Bootstrap)

    config = providers.Configuration()

    github_client = providers.Factory(
        Github,
        login_or_token=config.github.auth_token,
        timeout=config.github.request_timeout,
    )

    search_service = providers.Factory(
        services.SearchService,
        github_client=github_client,
    )

    index_view = flask.View(views.index)
検索を接続する
これで、検索を機能させる準備が整いました。ビューで使用
SearchServiceしてみましょうindex。
編集
views.py:
"""Views module."""

from flask import request, render_template

from .services import SearchService


def index(search_service: SearchService):
    query = request.args.get('query', 'Dependency Injector')
    limit = request.args.get('limit', 10, int)

    repositories = search_service.search_repositories(query, limit)

    return render_template(
        'index.html',
        query=query,
        limit=limit,
        repositories=repositories,
    )
次に、コンテナを変更して、呼び出されたときに依存関係
SearchServiceをビューindexに渡すようにします。
編集
containers.py:
"""Application containers module."""

from dependency_injector import containers, providers
from dependency_injector.ext import flask
from flask import Flask
from flask_bootstrap import Bootstrap
from github import Github

from . import services, views


class ApplicationContainer(containers.DeclarativeContainer):
    """Application container."""

    app = flask.Application(Flask, __name__)

    bootstrap = flask.Extension(Bootstrap)

    config = providers.Configuration()

    github_client = providers.Factory(
        Github,
        login_or_token=config.github.auth_token,
        timeout=config.github.request_timeout,
    )

    search_service = providers.Factory(
        services.SearchService,
        github_client=github_client,
    )

    index_view = flask.View(
        views.index,
        search_service=search_service,
    )
アプリケーションが実行されていることを確認するか、http://127.0.0.1:5000 /を実行
flask runして開きます。
次のように表示されます。
少しリファクタリング
ビューに
indexは、ハードコードされた2つの値が含まれています。
- デフォルトの検索語
- 結果数の制限
少しリファクタリングしてみましょう。これらの値を構成に転送します。
編集
views.py:
"""Views module."""

from flask import request, render_template

from .services import SearchService


def index(
        search_service: SearchService,
        default_query: str,
        default_limit: int,
):
    query = request.args.get('query', default_query)
    limit = request.args.get('limit', default_limit, int)

    repositories = search_service.search_repositories(query, limit)

    return render_template(
        'index.html',
        query=query,
        limit=limit,
        repositories=repositories,
    )
ここで、これらの値を呼び出しで渡す必要があります。コンテナを更新しましょう。
編集
containers.py:
"""Application containers module."""

from dependency_injector import containers, providers
from dependency_injector.ext import flask
from flask import Flask
from flask_bootstrap import Bootstrap
from github import Github

from . import services, views


class ApplicationContainer(containers.DeclarativeContainer):
    """Application container."""

    app = flask.Application(Flask, __name__)

    bootstrap = flask.Extension(Bootstrap)

    config = providers.Configuration()

    github_client = providers.Factory(
        Github,
        login_or_token=config.github.auth_token,
        timeout=config.github.request_timeout,
    )

    search_service = providers.Factory(
        services.SearchService,
        github_client=github_client,
    )

    index_view = flask.View(
        views.index,
        search_service=search_service,
        default_query=config.search.default_query,
        default_limit=config.search.default_limit,
    )
それでは、設定ファイルを更新しましょう。
編集
config.yml:
github:
  request_timeout: 10
search:
  default_query: "Dependency Injector"
  default_limit: 10
完了。
リファクタリングが完了しました。Muはコードをよりクリーンにしました。
テストの追加
いくつかのテストを追加するとよいでしょう。やってみましょう。pytestとcoverage
を使用します。 編集:
requirements.txt
dependency-injector
flask
bootstrap-flask
pygithub
pyyaml
pytest-flask
pytest-cov
新しいパッケージをインストールします。
pip install -r requirements.txt
tests.pyパッケージに
空のファイルを作成しますgithubnavigator。
./
├── githubnavigator/
│   ├── templates/
│   │   ├── base.html
│   │   └── index.html
│   ├── __init__.py
│   ├── application.py
│   ├── containers.py
│   ├── services.py
│   ├── tests.py
│   └── views.py
├── venv/
├── config.yml
└── requirements.txt
それに次の行を追加します。
"""Tests module."""

from unittest import mock

import pytest
from github import Github
from flask import url_for

from .application import create_app


@pytest.fixture
def app():
    return create_app()


def test_index(client, app):
    github_client_mock = mock.Mock(spec=Github)
    github_client_mock.search_repositories.return_value = [
        mock.Mock(
            html_url='repo1-url',
            name='repo1-name',
            owner=mock.Mock(
                login='owner1-login',
                html_url='owner1-url',
                avatar_url='owner1-avatar-url',
            ),
            get_commits=mock.Mock(return_value=[mock.Mock()]),
        ),
        mock.Mock(
            html_url='repo2-url',
            name='repo2-name',
            owner=mock.Mock(
                login='owner2-login',
                html_url='owner2-url',
                avatar_url='owner2-avatar-url',
            ),
            get_commits=mock.Mock(return_value=[mock.Mock()]),
        ),
    ]

    with app.container.github_client.override(github_client_mock):
        response = client.get(url_for('index'))

    assert response.status_code == 200
    assert b'Results found: 2' in response.data

    assert b'repo1-url' in response.data
    assert b'repo1-name' in response.data
    assert b'owner1-login' in response.data
    assert b'owner1-url' in response.data
    assert b'owner1-avatar-url' in response.data

    assert b'repo2-url' in response.data
    assert b'repo2-name' in response.data
    assert b'owner2-login' in response.data
    assert b'owner2-url' in response.data
    assert b'owner2-avatar-url' in response.data


def test_index_no_results(client, app):
    github_client_mock = mock.Mock(spec=Github)
    github_client_mock.search_repositories.return_value = []

    with app.container.github_client.override(github_client_mock):
        response = client.get(url_for('index'))

    assert response.status_code == 200
    assert b'Results found: 0' in response.data
それでは、テストを開始してカバレッジを確認しましょう。
py.test githubnavigator/tests.py --cov=githubnavigator
次のように表示されます。
platform darwin -- Python 3.8.3, pytest-5.4.3, py-1.9.0, pluggy-0.13.1
plugins: flask-1.0.0, cov-2.10.0
collected 2 items

githubnavigator/tests.py ..                                     [100%]

---------- coverage: platform darwin, python 3.8.3-final-0 -----------
Name                             Stmts   Miss  Cover
----------------------------------------------------
githubnavigator/__init__.py          0      0   100%
githubnavigator/application.py      11      0   100%
githubnavigator/containers.py       13      0   100%
githubnavigator/services.py         14      0   100%
githubnavigator/tests.py            32      0   100%
githubnavigator/views.py             7      0   100%
----------------------------------------------------
TOTAL                               77      0   100%
github_clientメソッドを使用してモックに置き換える方法に注目してください.override()。このようにして、任意のプロバイダーの戻り値をオーバーライドできます。
結論
依存関係の注入を使用してFlaskアプリケーションを構築しました。依存関係インジェクターフレームワークとして依存関係インジェクターを使用しました。
アプリケーションの主要部分はコンテナです。アプリケーションのすべてのコンポーネントとそれらの依存関係が1か所に含まれています。これにより、アプリケーションの構造を制御できます。理解して変更するのは簡単です。
"""Application containers module."""

from dependency_injector import containers, providers
from dependency_injector.ext import flask
from flask import Flask
from flask_bootstrap import Bootstrap
from github import Github

from . import services, views


class ApplicationContainer(containers.DeclarativeContainer):
    """Application container."""

    app = flask.Application(Flask, __name__)

    bootstrap = flask.Extension(Bootstrap)

    config = providers.Configuration()

    github_client = providers.Factory(
        Github,
        login_or_token=config.github.auth_token,
        timeout=config.github.request_timeout,
    )

    search_service = providers.Factory(
        services.SearchService,
        github_client=github_client,
    )

    index_view = flask.View(
        views.index,
        search_service=search_service,
        default_query=config.search.default_query,
        default_limit=config.search.default_limit,
    )

アプリケーションのマップとしてのコンテナー。あなたは常に何が何に依存するかを知っています。
次は何ですか?
- GitHubのDependencyInjectorの詳細
- Read theDocsのドキュメントを確認してください
- 質問があるか、バグを見つけますか?Githubで問題を開く