
良い一日、友達!
この記事では、サーバーに接続せずにページをルーティングおよびレンダリングすることに関連する、最新のJavaScriptの機能とブラウザーによって提供されるインターフェイスのいくつかを紹介します。GitHubの
ソースコード。CodeSandboxで コードを試すことができます。 アプリケーションの実装を進める前に、次の点に注意してください。
- (あなたがする場合は、スケーラブルな)方法を見つけることができる私たちは、汎用性の高い、最も単純なクライアント・ルーティングの1とレンダリングオプション、より複雑なのカップルとを実装しますこちら
- . : , .. , ( -, .. , ). index.html .
- 可能な限り適切な場合は、動的インポートを使用します。これにより、要求されたリソースのみをロードでき(以前は、Webpackなどのモジュールビルダーを使用してコードをパーツ(チャンク)に分割することによってのみ実行できました)、パフォーマンスに優れています。動的インポートを使用すると、ほとんどすべてのコードが非同期になります。これは、プログラムフローのブロックを回避するため、一般的にも優れています。
じゃあ行こう。
サーバーから始めましょう。
ディレクトリを作成し、そのディレクトリに移動して、プロジェクトを初期化します。
mkdir client-side-rendering
cd !$
yarn init -yp
//
npm init -y
依存関係をインストールします。
yarn add express nodemon open-cli
//
npm i ...
- 表現-はるかに簡単にサーバーを構築しますNode.jsのフレームワークを
- nodemon-サーバーを起動して自動的に再起動するためのツール
- open-cli-サーバーが実行されているアドレスでブラウザータブを開くことができるツール
時々(非常にまれに)open-cliは、nodemonがサーバーを起動するよりも速くブラウザータブを開きます。この場合、ページをリロードするだけです。
次の内容でindex.jsを作成します。
const express = require('express')
const app = express()
const port = process.env.PORT || 1234
// src - , , index.html
// , , public
// index.html src
app.use(express.static('src'))
// index.html,
app.get('*', (_, res) => {
res.sendFile(`${__dirname}/index.html`, null, (err) => {
if (err) console.error(err)
})
})
app.listen(port, () => {
console.log(`Server is running on port ${port}`)
})
index.htmlを作成します(ブートストラップはアプリケーションのメインスタイルに使用されます):
<head>
...
<!-- Bootstrap CSS -->
<link rel="stylesheet" href="https://stackpath.bootstrapcdn.com/bootstrap/3.4.1/css/bootstrap.min.css" integrity="sha384-HSMxcRTRxnN+Bdg0JdbxYKrThecOKuH5zCYotlSAcp1+c8xmyTe9GYg1l9a69psu" crossorigin="anonymous" />
<link rel="stylesheet" href="style.css" />
</head>
<body>
<header>
<nav>
<!-- "data-url" -->
<a data-url="home">Home</a>
<a data-url="project">Project</a>
<a data-url="about">About</a>
</nav>
</header>
<main></main>
<footer>
<p>© 2020. All rights reserved</p>
</footer>
<!-- "type" "module" -->
<script src="script.js" type="module"></script>
</body>
追加のスタイルを設定するには、src /style.cssを作成します。
body {
min-height: 100vh;
display: grid;
justify-content: center;
align-content: space-between;
text-align: center;
color: #222;
overflow: hidden;
}
nav {
margin-top: 1rem;
}
a {
font-size: 1.5rem;
cursor: pointer;
}
a + a {
margin-left: 2rem;
}
h1 {
font-size: 3rem;
margin: 2rem;
}
div {
margin: 2rem;
}
div > article {
cursor: pointer;
}
/* ! . */
div > article > * {
pointer-events: none;
}
footer p {
font-size: 1.5rem;
}
サーバーを起動し、package.jsonでブラウザータブを開くコマンドを追加します。
"scripts": {
"dev": "open-cli http://localhost:1234 && nodemon index.js"
}
次のコマンドを実行します。
yarn dev
//
npm run dev
先に進みます。
home.js、project.js、about.jsの3つのファイルを使用してsrc / pagesディレクトリを作成します。各ページは、「content」プロパティと「url」プロパティを持つデフォルトのエクスポートされたオブジェクトです。
home.js:
export default {
content: `<h1>Welcome to the Home Page</h1>`,
url: 'home'
}
project.js:
export default {
content: `<h1>This is the Project Page</h1>`,
url: 'project',
}
about.js:
export default {
content: `<h1>This is the About Page</h1>`,
url: 'about',
}
メインスクリプトに移りましょう。
その中で、ローカルストレージを使用して保存し、(ユーザーがサイトに戻った後)現在のページとHistory APIを取得して、ブラウザーの履歴を管理します。
ストレージに関しては、setItemメソッドを使用してデータを書き込みます。これは、保存されたデータの名前とデータ自体の2つのパラメーターを取り、JSON文字列に変換されます--localStorage.setItem( 'pageName'、JSON.stringify(url))。
データを取得するには、データの名前を取得するgetItemメソッドを使用します。ストレージからJSON文字列として受信したデータは、通常の文字列(この場合)に変換されます:JSON.parse(localStorage.getItem( 'pageName'))。
履歴APIについては、我々はによって提供履歴オブジェクトの二つの方法に使用する履歴インターフェース:replaceStateとpushStateを。
どちらのメソッドも、2つの必須パラメーターと1つのオプションパラメーターを取ります。状態オブジェクト、タイトル、およびパス(URL)-history.pushState(状態、タイトル[、url])です。
状態オブジェクトは、ユーザーが新しい状態に移行したとき(たとえば、ブラウザーのコントロールパネルの戻るボタンが押されたとき)に「ウィンドウ」オブジェクトで発生する「ポップステート」イベントを処理して前のページをレンダリングするときに使用されます。
URLは、ブラウザのアドレスバーに表示されるパスをカスタマイズするために使用されます。
動的インポートのおかげで、アプリケーションの起動時にロードされるページは1つだけであることに注意してください。ユーザーが初めてサイトにアクセスした場合はホームページ、または最後に表示したページのいずれかです。開発者ツールの[ネットワーク]タブの内容を調べることで、必要なリソースのみがロードされていることを確認できます。
src / script.jsを作成します:
class App {
//
#page = null
// :
//
constructor(container, page) {
this.$container = container
this.#page = page
//
this.$nav = document.querySelector('nav')
//
// -
this.route = this.route.bind(this)
//
//
this.#initApp(this.#page)
}
//
// url
async #initApp({ url }) {
//
// localhost:1234/home
history.replaceState({ pageName: `${url}` }, `${url} page`, url)
//
this.#render(this.#page)
//
this.$nav.addEventListener('click', this.route)
// "popstate" -
window.addEventListener('popstate', async ({ state }) => {
//
const newPage = await import(`./pages/${state.page}.js`)
//
this.#page = newPage.default
//
this.#render(this.#page)
})
}
//
//
#render({ content }) {
//
this.$container.innerHTML = content
}
//
async route({ target }) {
//
if (target.tagName !== 'A') return
//
const { url } = target.dataset
//
//
//
if (this.#page.url === url) return
//
const newPage = await import(`./pages/${url}.js`)
//
this.#page = newPage.default
//
this.#render(this.#page)
//
this.#savePage(this.#page)
}
//
#savePage({ url }) {
history.pushState({ pageName: `${url}` }, `${url} page`, url)
localStorage.setItem('pageName', JSON.stringify(url))
}
}
//
;(async () => {
//
const container = document.querySelector('main')
// "home"
const pageName = JSON.parse(localStorage.getItem('pageName')) ?? 'home'
//
const pageModule = await import(`./pages/${page}.js`)
//
const pageToRender = pageModule.default
// ,
new App(container, pageToRender)
})()
マークアップのh1テキストを変更します。
<h1>Loading...</h1>
サーバーを再起動します。

優秀な。すべてが期待どおりに機能します。
これまでは静的コンテンツのみを扱ってきましたが、動的コンテンツでページをレンダリングする必要がある場合はどうでしょうか。この場合、クライアントに限定することは可能ですか、それともこのタスクはサーバーだけが実行できますか?
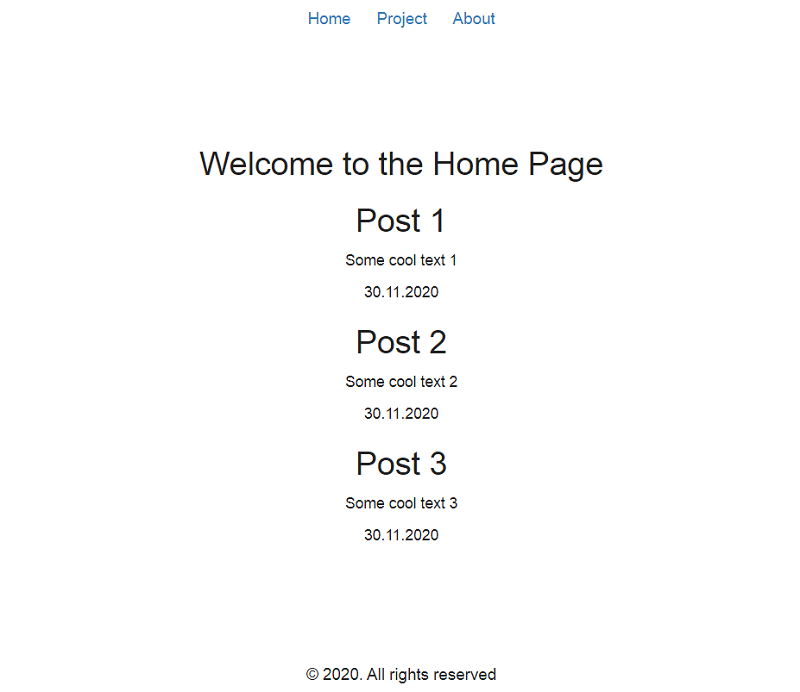
メインページが投稿のリストを表示することであると仮定しましょう。投稿をクリックすると、そのコンテンツを含むページがレンダリングされます。投稿ページもlocalStorageに保持され、ページのリロード後にレンダリングされる必要があります(ブラウザタブを閉じる/開く)。
名前付きJSモジュールの形式でローカルデータベースを作成します-src / data / db.js:
export const posts = [
{
id: '1',
title: 'Post 1',
text: 'Some cool text 1',
date: new Date().toLocaleDateString(),
},
{
id: '2',
title: 'Post 2',
text: 'Some cool text 2',
date: new Date().toLocaleDateString(),
},
{
id: '3',
title: 'Post 3',
text: 'Some cool text 3',
date: new Date().toLocaleDateString(),
},
]
投稿テンプレートジェネレータを作成します(名前付きエクスポートの形式でも:動的インポートの場合、名前付きエクスポートはデフォルトよりもいくらか便利です)-src / templates / post.js:
//
export const postTemplate = ({ id, title, text, date }) => ({
content: `
<article id="${id}">
<h2>${title}</h2>
<p>${text}</p>
<time>${date}</time>
</article>
`,
// ,
// : `post/${id}`, post
//
//
url: `post#${id}`,
})
IDで投稿を検索するヘルパー関数を作成します-src / helpers / find-post.js:
//
import { postTemplate } from '../templates/post.js'
export const findPost = async (id) => {
//
//
//
// ,
const { posts } = await import('../data/db.js')
//
const postToShow = posts.find((post) => post.id === id)
//
return postTemplate(postToShow)
}
src / pages /home.jsに変更を加えましょう。
//
import { postTemplate } from '../templates/post.js'
//
export default {
content: async () => {
//
const { posts } = await import('../data/db.js')
//
return `
<h1>Welcome to the Home Page</h1>
<div>
${posts.reduce((html, post) => (html += postTemplate(post).content), '')}
</div>
`
},
url: 'home',
}
src /script.jsを少し修正しましょう。
//
import { findPost } from './helpers/find-post.js'
class App {
#page = null
constructor(container, page) {
this.$container = container
this.#page = page
this.$nav = document.querySelector('nav')
this.route = this.route.bind(this)
//
//
this.showPost = this.showPost.bind(this)
this.#initApp(this.#page)
}
#initApp({ url }) {
history.replaceState({ page: `${url}` }, `${url} page`, url)
this.#render(this.#page)
this.$nav.addEventListener('click', this.route)
window.addEventListener('popstate', async ({ state }) => {
//
const { page } = state
// post
if (page.includes('post')) {
//
const id = page.replace('post#', '')
//
this.#page = await findPost(id)
} else {
// ,
const newPage = await import(`./pages/${state.page}.js`)
//
this.#page = newPage.default
}
this.#render(this.#page)
})
}
async #render({ content }) {
this.$container.innerHTML =
// , ,
// ..
typeof content === 'string' ? content : await content()
//
this.$container.addEventListener('click', this.showPost)
}
async route({ target }) {
if (target.tagName !== 'A') return
const { url } = target.dataset
if (this.#page.url === url) return
const newPage = await import(`./pages/${url}.js`)
this.#page = newPage.default
this.#render(this.#page)
this.#savePage(this.#page)
}
//
async showPost({ target }) {
//
// : div > article > * { pointer-events: none; } ?
// , , article,
// , .. e.target
if (target.tagName !== 'ARTICLE') return
//
this.#page = await findPost(target.id)
this.#render(this.#page)
this.#savePage(this.#page)
}
#savePage({ url }) {
history.pushState({ page: `${url}` }, `${url} page`, url)
localStorage.setItem('pageName', JSON.stringify(url))
}
}
;(async () => {
const container = document.querySelector('main')
const pageName = JSON.parse(localStorage.getItem('pageName')) ?? 'home'
let pageToRender = ''
// "post" ..
// . popstate
if (pageName.includes('post')) {
const id = pageName.replace('post#', '')
pageToRender = await findPost(id)
} else {
const pageModule = await import(`./pages/${pageName}.js`)
pageToRender = pageModule.default
}
new App(container, pageToRender)
})()
サーバーを再起動します。
アプリケーションは機能しますが、現在の形式のコードの構造には多くの要望が残されていることに同意します。たとえば、ページと投稿のルーティングを組み合わせる追加のクラス「Router」を導入することで、改善できます。ただし、機能プログラミングについては説明します。
別のヘルパー関数を作成しましょう-src / helpers / check-page-name.js:
//
import { findPost } from './find-post.js'
export const checkPageName = async (pageName) => {
let pageToRender = ''
if (pageName.includes('post')) {
const id = pageName.replace('post#', '')
pageToRender = await findPost(id)
} else {
const pageModule = await import(`../pages/${pageName}.js`)
pageToRender = pageModule.default
}
return pageToRender
}
src / templates / post.jsを少し変更してみましょう。つまり、「article」タグの「id」属性を「data-url」属性の値「post#$ {id}」に置き換えます。
<article data-url="post#${id}">
src /script.jsの最終リビジョンは次のようになります。
import { checkPageName } from './helpers/check-page-name.js'
class App {
#page = null
constructor(container, page) {
this.$container = container
this.#page = page
this.route = this.route.bind(this)
this.#initApp()
}
#initApp() {
const { url } = this.#page
history.replaceState({ pageName: `${url}` }, `${url} page`, url)
this.#render(this.#page)
document.addEventListener('click', this.route, { passive: true })
window.addEventListener('popstate', async ({ state }) => {
const { pageName } = state
this.#page = await checkPageName(pageName)
this.#render(this.#page)
})
}
async #render({ content }) {
this.$container.innerHTML =
typeof content === 'string' ? content : await content()
}
async route({ target }) {
if (target.tagName !== 'A' && target.tagName !== 'ARTICLE') return
const { link } = target.dataset
if (this.#page.url === link) return
this.#page = await checkPageName(link)
this.#render(this.#page)
this.#savePage(this.#page)
}
#savePage({ url }) {
history.pushState({ pageName: `${url}` }, `${url} page`, url)
localStorage.setItem('pageName', JSON.stringify(url))
}
}
;(async () => {
const container = document.querySelector('main')
const pageName = JSON.parse(localStorage.getItem('pageName')) ?? 'home'
const pageToRender = await checkPageName(pageName)
new App(container, pageToRender)
})()
ご覧のとおり、History APIは、動的インポートと組み合わせて、サーバーの関与をほとんど必要とせずに単一ページアプリケーション(SPA)を作成するプロセスを大幅に容易にする非常に興味深い機能を提供します。
アプリケーションの開発をどこから始めればよいかわからない場合は、Modern HTML StarterTemplateから始めてください。
最近、JavaScriptのデザインパターンに関する小さな調査を完了しました。結果はここで見ることができます。
何か面白いものを見つけていただければ幸いです。清聴ありがとうございました。