この記事の目的は、キャラクターをMakehumanからUnity3dに転送して、ゲーム中に服を脱いで着ることができるようにすることです。
このために我々は必要Makehuman、Blender3d、Unity3dとそのUMAのプラグインを(彼らはすべて無料)。この記事はこのYouTubeチャンネルに基づいて書かれており、著者の後に繰り返し、多くのバンプを埋めました。これで、ビジョンを述べる準備が整いました。
ステージ1:Makehumanでのキャラクター作成
これは最も簡単で楽しいステージです。ここでは、キャラクターをモデル化する必要があります。Makehumanはかなり単純なプログラムなので、その操作方法については説明しません。
しかし、3つの重要なポイントがあります。まず、モデルにスケルトンを追加する必要があります([ポーズ/アニメーション]タブで追加)。このチュートリアルでは、ゲームエンジンリグを使用しています。次に、キャラクターに服がある場合は、服の下のポリゴンを削除するオプションを無効にする必要があります(これは、[ジオメトリ]-> [服]タブで実行でき、[服の下の顔を非表示]チェックボックスをオフにします)。第三に、fbxにエクスポートし、メートルの単位を指定する必要があります。また、万が一の場合に備えて、モデルを保存することもできます。
いくつかの追加ポイント
キャラクターのポーズを変える必要はありません。
服は部分的に輸出することができます。つまり、一度にすべての服を着る必要はありません。たとえば、最初にズボンとシャツしか持っていないキャラクターを保存することができます。ブレンダーでそれらをエクスポートしてから、makehumanに戻り、古着を脱いで、帽子やブーツなどのエクスポート操作を繰り返します。
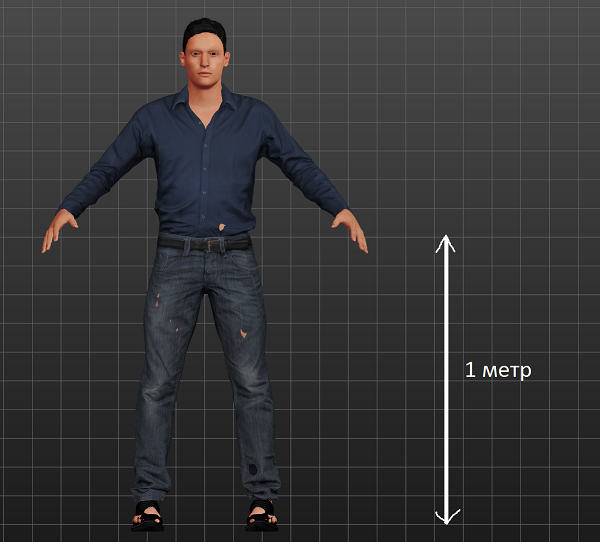
測定単位はメートルです。つまり、makehumanの10個のセルは従来のメーターを意味します。
ステージ2:Blender3dで処理する
ここで行う必要があることは3つあります。
モデルの正規化
グローバルボーンを追加する
体の部分をカット
Blender3dを起動します。まず、ライト、カメラ、キューブを削除して、モデルをインポートする必要があります。次に、モデルをインポートします:ファイル->インポート-> fbx(そしてfbxファイルを選択します)
踏んだレーキ
, makehuman, ( fbx , ). .
. , , , , . , . .

, ( a)
pose ->clear transform -> all

, , . .
90 ,
.

. R , X . -90 Enter
, .
, , , , . scale 0.500, 1.000. , scale, , . .
0° 1.000 ( ).
, ( ) ctrl + a, rotation & scale.
, UMA. .
Global (Head= 0,0,0 Tail=0,0,0.1) //
Position (Head= 0,0,0 Tail=0,0,0.1) // Root
( pelvis)
Root Position. Transform .

( Game_engine) . add -> single bone

bone, Global , Position.
Global Position. Position.

Global, shift, Position. 3d ctrl + p, keep offset.
UMA - / - . , , .
-
-
( )
-
-
-
(seams mesh). , ( , ). .
seams mesh
( ). (, ) .

shift + d, RMB

.
seams mesh ( ).
, .
( seams mesh).
.

alt ( , ).

UPD: ( c) , ValeryIvanov :
( h), L ( ), , Alt + L. P Selection. , .
")
")
、選択範囲を選択します(P->選択範囲)")
.
. . .

.

, seams mesh . .
fbx ( makehuman )
3: UMA
unity, , unity. UMA - Unity Multipurpose Avatar, . UMA/Getting Started/UMA_GLIB .
, characters. (fbx ). , . fix now.
UMA ( characters), . . , .
fbx , Convert Units, Apply. rig animation type, Humanoid Apply.
UMA -> Extract T-Pose ( fbx ). TPoses -.
UMA -> Slot Builder, . fbx seams mesh seams mesh Slot Builder. UMAMaterial UMA_defuse ( ). slot destination folder .
automatic Drag and Drop porcessig. , , ( ). , seams mesh None , .
. , UMA, , , , , ( ). , , Create -> UMA -> Core -> Overlay Asset. Overlay name ( head), material ( UMA_defuse) 1, _MainTex . .
TextRecipe RaceData
Create -> UMA -> Core -> Race Data, Create -> UMA -> Core -> Text Recipe. - . - / . . , Race Name , TPose - . Base Race Recipe .
Wardrobe Slots, - , . Wardrobe Recipe. Wardrobe Recipe . Wardrobe Recipe ? , () . , , ( , ). Wardrobe Recipe , , ( ), , . Wardrobe Slots :
None
Hair
Shirt
Pants
Shoes
BaseRecipe, Slots. Race Data (, ). ( ). . . , shared overlays.
UMA -> Global Library, .
. UMA/Getting Started/UMADynamicCharacterAvatar ( ). Dynamic Character Avatar Active Race .
( , ). , . Race Animation Controllers Race Animators , Race , Animator IdleTest-w-head.
Play. .
Create -> UMA -> DCS -> Waredrop Recipe, , Wardrobe Slot . , . , . . , Customization -> Default Recipes .
, . Create -> UMA -> Misc -> Mesh Hide Asset, , , Begin Editing , . Waredrop Recipe Add Mesh Hide Asset, .
. Dynamic Character Avatar, Customisation -> Default Waredrop Recipes .
DynamicCharacterAvatar. SetSlot ClearSlot , BuildCharacter. SetSlot . . Waredrop Recipe. ClearSlot .
SetSlot ()
, . , SetSlot Waredrop Slot Waredrop Recipe.
, - AddWardrobe RemoveWardrobe.
using System.Collections;
using System.Collections.Generic;
using UnityEngine;
using UMA;
using UMA.CharacterSystem;
public class Program : MonoBehaviour
{
// Dynamic Character Avatar
public GameObject DCA;
private DynamicCharacterAvatar avatar;
void Start(){
avatar = DCA.GetComponent<DynamicCharacterAvatar>();
}
public void AddWardrobe(string wardrobeSlot, string wardrobeRecipe){
avatar.SetSlot(wardrobeSlot,wardrobeRecipe);
avatar.BuildCharacter();
}
public void RemoveWardrobe(string wardrobeSlot){
avatar.ClearSlot(wardrobeSlot);
avatar.BuildCharacter();
}
}
最後まで読んでいただきありがとうございます。この記事があなたの夢のゲームを作成するためのもう1つのステップになることを願っています。